CLICK HERE FOR FREE BLOGGER TEMPLATES, LINK BUTTONS AND MORE! »
Showing posts with label dress. Show all posts

Wednesday, February 23, 2011

Creative Mending

I love the excitement of creating something.. the low whir of the sewing machine joining fabric pieces together.

I'm not so big on 'mending'. It's so bad that I could go on for months, not wearing a shirt if the button came off.. *hangs head in shame*

But then they did say that children can really motivate you to do things.

See, when dear husband went to the States, he went on a shopping spree at the outlet store.. Lil Miss and Lil Master were recipients to many wonderful clothes. Out of all the clothes Lil Miss received, she loved this really comfortable salmon pink dress from DKNY. It's a soft stretchy cotton jersey knit.. simple design.. with an A-line-ish skirt. But the piece de resistance was the chiffony tiered outer layer skirt. Lil Miss is all about girly twirly skirts.


Alas, with wear, there's tear.. :(

The chiffony part was beginning to fray too.. When Lil Miss saw the tear.. she came up to me and asked me to sew it back for her. Something about the lil puppy dog eyes made me say OK.. probably a little too fast.

The tear was small.. but yet, how to do it elegantly?

I took thread.. and I handstitched.. satin stitch like stitches.. (and I'm horrible with even stitches).
The end result is ugly noticeable stitches.. clearly patching a tear.

What am I to do...

What else can I do but to ransack my stash :)

I found a thin cotton lining material in red (it was meant to be sewn as lining to a blouse I planned on making for CNY.. but that's another story).

Cut two long strips, folded it together, sewed and ruffled..

I then formed a simple rossette with each ruffled strip. Sewed up the bottom of each rossette, making sure I catch all layers.. and slowly place it over the mended tear on the dress...

Tada!

Showed it to Lil Miss... she approves.. :)


Saturday, January 8, 2011

Party Dress & more

My daily routine at work is
1. Check emails
2. Check craft blogs.
3. Repeat
:)

Nearly everyday, I would find a new inspiration or a new tute that I want to remake. One of them was this lovely party dress from The Cottage Home.

The contrasting sash, classic and oh-so-cute.


I had this fabric, intending to be made into a dress for lil miss.. but alas.. I didn't manage to because there were just too many elements for the party. Feeling guilty, I made sure it was made into a dress for Christmas.


Lil miss wanted a very twirly dress, so I made a semi circle skirt instead of the gathered skirt in the tutorial. Why not a full circle? ..  Erm.. let's just call it a cutting accident.. *blush*

I really hit jackpot with this dress. Lil miss was twirling the entire time she had it on. She even cried when she had to take it off before going to bed.
Annoying coz we had to coax her to change into her jammies.. but so 'heart-melting' that she loved something I made for her so much.

So what's the 'more' in the title?

Well, after making the dress, there was some fabric left. And I really liked this cotton.. it's thin, airy and very comfortable in our humid weather. So I made a flirty lil blouse for lil miss.


Hey, you even get to see her modeling it this time.
(sorry, the blouse was wrinkly coz it was fresh out of laundry.. and I wanted to capture the picture in natural light.. gloomy skies and all)


Picnic Dress


Have I mentioned how much I love border prints? 
Well, I love border prints :) 
Especially uber cute ones like this Kokka Cotton.


The moment I saw this fabric, I knew I had to make a dress for lil miss. It took ALL I HAD to hold off buying this fabric till I had a sewing machine and is more comfortable in sewing wearables. So finally, after many many moons.. I purchased it.

At first, I thought I'll make the dress for Chinese New Year, but hubby said the fabric looked more like Christmas. 

He's more of a traditional RED for Chinese New Year kinda guy. 

I had this Japanese pattern book that had this A-line dress pattern in it and it was really easy to whip up (a link to the book on Amazon can be found at the end of this post)


Plus, it really helps to show off the cute pattern at the border. (Yes, that's the selvedge you see at the hem.. I left it there so that it won't fray.. and yes, I'm that lazy)

 I loved the pattern so much, I even cut the bodice from the border.. and made buttons from characters found on the border..

I would definitely make this pattern again. It's so simple, and has plenty of room for lil miss to grow into.

Fabric bought from Fabric Fanatics


Linking to these parties

Keeping It Simple


Tuesday, November 30, 2010

The Dress

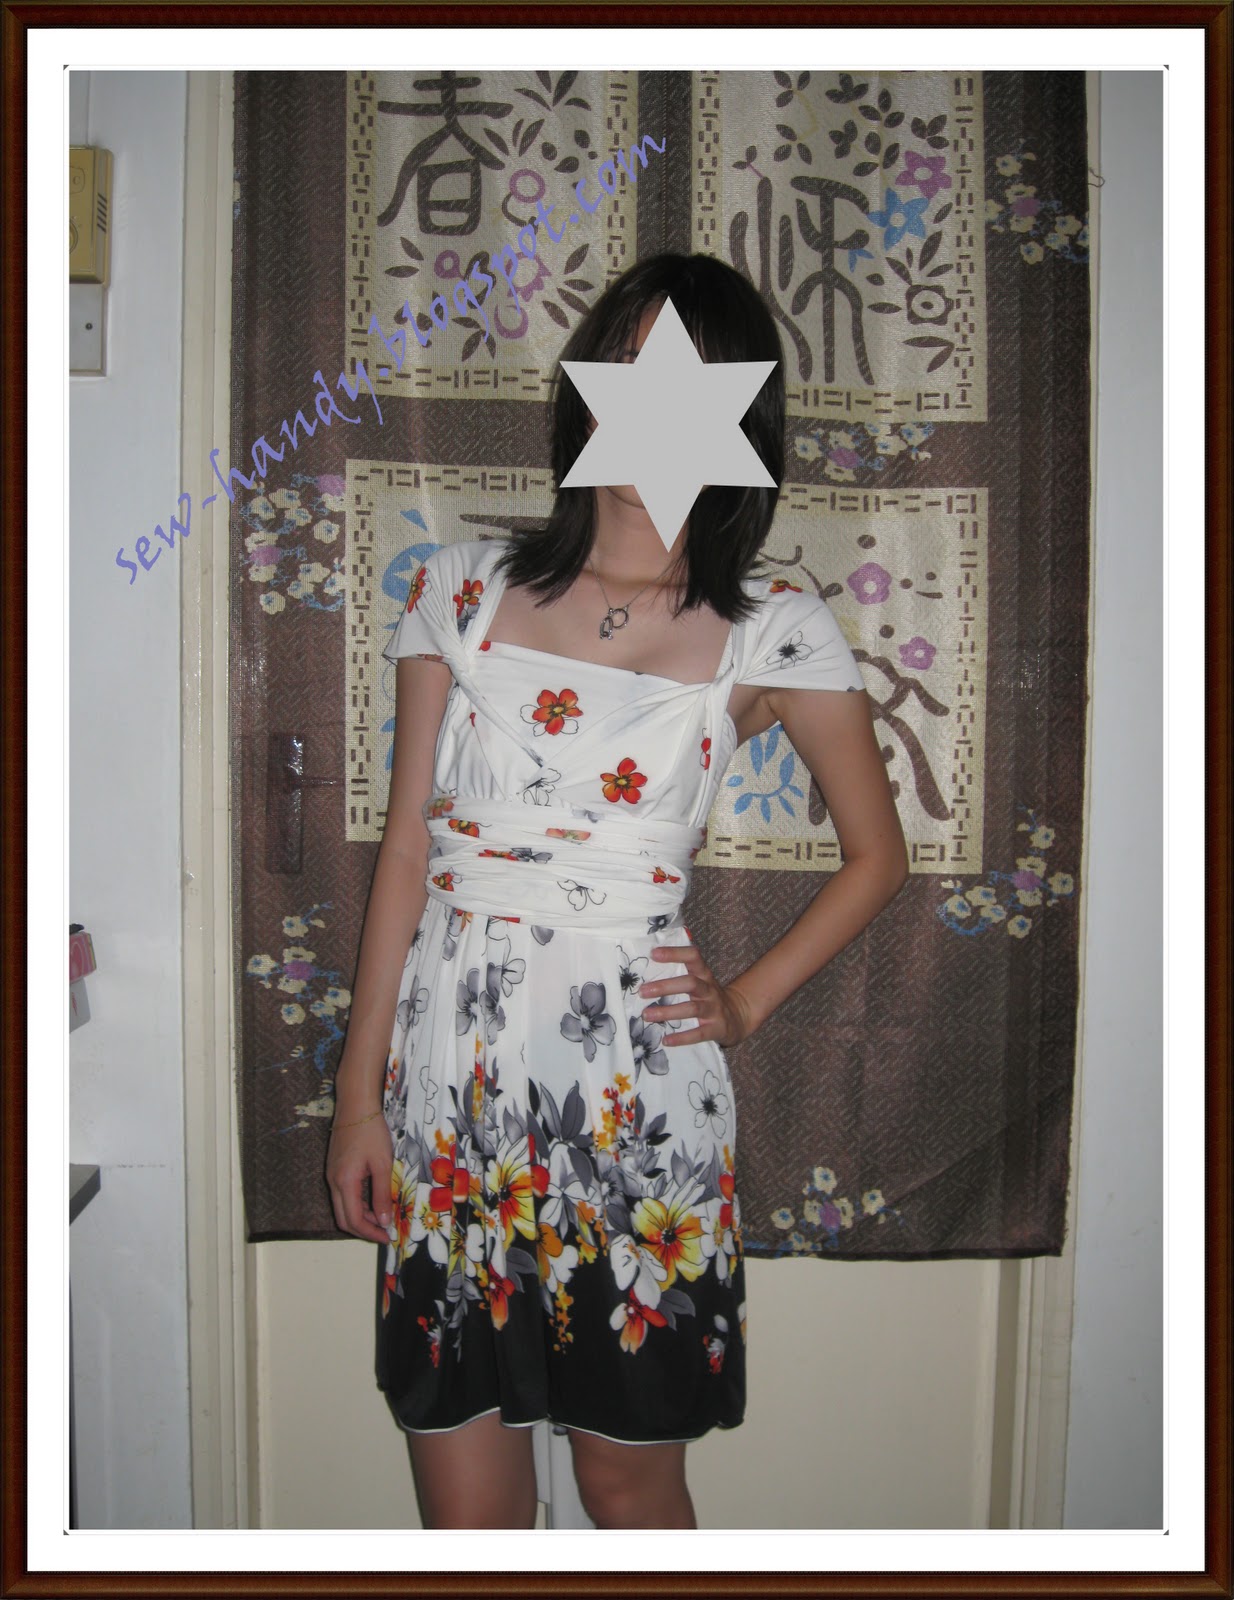
About 2 years back, while surfing blogs, I stumbled upon a nifty little dress called the 'Infinity Dress'. 1 dress, multiple ways of wearing it. Brilliant!

Then I saw the instructions on Rostitchery, and decided to give it a try. I did not have a sewing machine, and was very green to the fabric market here in Malaysia (greater KL area to be precise). So I went off to the nearest Nagoya  to see if I could get any 'stretchy' material. When I was there, they ONLY had a Barney Purple knit (2-way stretch). I was desperate.. I needed to sew that dress.. and I got it.

Now I have to tell you this, I was struggling with my weight (am still) post-baby, and being a total noob.. I must've messed up measurements and obviously couldn't cut a straight line. Long story short. The dress was horrendous. So bad, that I do not have any photographic evidence. In fact, I have no idea what happened to the said dress.

Fast-forward, now. 

The 'Infinity Dress' or Convertible dress seems to have re-gained popularity. Many youtube links have been put in FaceBook and many have been tagged.. (since everyone's tagged into anything nowadays). And my sis was showing me this

Same dress, with more glam I suppose. 

So, for my sis' birthday, I decided to give the Infinity Dress another go.

I went back to the SAME fabric shop I went 2 years ago, and it now carries many more different fabric. The whole knit section was bursting with colors. Then this lovely border design fabric caught my eye. 3 meters, 1.5 hours later.. this happened.

The Infinity Dress
I stuck on to Rostitchery's instructions, but with some modifications.

  1. Decided not to do a circle skirt. Leveraged on the beautiful border and made a normal gathered skirt instead. I prefer the more streamlined look of the skirt this way. 
  2. Enlarged the waistband to become a tube top for better coverage.

Am glad that sis loved the way it turned out. She looks stunning in it. It helps that she's so thin too :P..

Back View
I intentionally left the straps UBER long, coz I sew the dress WITHOUT my sis around. So I wasn't sure how long was long enough. Since knit is so forgiving in the 'fraying' department, she could just cut the straps to size later.

I love the look so much, and have been searching for more and more ways of tying the dress, that .. dare I say it.. I intend to make one for myself now.

Such a dilemma.. I was all set to follow the sew-along of Crepe on Gertie's blog. But I may be able to squeeze in an Infinity Dress for myself. (I am hoping that my hour-glass challenged body shape could pull off this look.. )

Friday, October 8, 2010

Crepe by Colette Patterns

I love dresses.

I especially love dresses that are cinched at the waist. So when I stumbled upon the new pattern that was being offered by the beautiful people at Colette Patterns, I fell in love.

I fell hard!

Crepe was amazing; princess neckline, a sash, a wrap, and most of all.. a pattern for a beginner. Me!

Image from Colette Patterns
Look at that beauty and tell me you are not in love. Go ahead I dare you... it's so classy yet simple and elegant.

And so.. after much deliberation with my credit card.. I bought the pattern. My FIRST pattern. My FIRST dress pattern. My FIRST pattern from Colette (I heart all their dresses.. but my credit card needs to recover from the exchange rate)

While waiting for the pattern to arrive, I set about looking for fabric. I was hesitant in getting fabric that was too costly, as I didn't know if my sewing skills would be up to par. So I settled with the following:


They were at RM5.00 (USD 1.60) per meter. I needed approximately 4.5m of the print and 1.5m of the contrast color for the sash. The material is silky and has a good drape on it, more commonly used for Baju Kurung.

Finally when the pattern arrived approximately 2.5 weeks later.. I couldn't wait to start.

The pattern piece was so daunting.. on the thin tissue like paper. I was so scared I would rip it.

I laid out my fabric and traced the required patterns on it (in retrospect, I should've traced onto butcher paper or some other paper and then transfer to the fabric. That way it's easier for me to reproduce the dress at a later date). The instructions that came in the booklet was very helpful.

My only gripe was that I do not have a serger, and finishing raw edges is not my favourite thing to do. With bags and pouches, it's easy to hide them with lining. With garments, plus the fact that it will be washed multiple times, hiding is not an option. Zig-zag and pinking shears were my friend.. but please don't look at my dress too closely.. the finishing on the inside is still horrendous.

I humbly give you, my version of Crepe


I love it. I love the pockets. I love the sash.

I learned so much with this.. I learned
a) How to sew in pockets for a dress .. and it's so simple
b) How to sew the princess neckline.. (I so heart it)
c) Most importantly I learnt not to be intimidated by LARGE pattern pieces.

Now that I've made one.. and wore it out (I can't believe it!).. I want to make more. Some people have asked me to make them one too.. hahah .. if only they'd seen the seams (shhh!)

The one gripe I have is the interface for the sleeve. they pop out easily.. Did I do something wrong? I'm thinking of putting in 'steam-a-seam' kind of adhesive to make it stay put. Any ideas?